Choosing the correct LED driver begins with more than reading a lamp’s wattage label. The driver must supply stable power without running continuously at its maximum rating. This guide, “Top 10 Tips on How to Calculate LED Driver Wattage,” explains the process in practical terms. It focuses on real installation conditions, not only ideal figures.
The key question is how to calculate led driver wattage requirements accurately. Start by adding the wattage of every connected LED module or strip. Then include a sensible safety margin, often between 20% and 30%, depending on the product and environment. For example, a 60-watt LED load may need a driver rated near 75 watts. Check voltage carefully. A 12-volt strip requires a compatible 12-volt driver. Voltage mismatch can cause flickering, overheating, or early failure.
Small details matter. Long cable runs can create voltage drop. Enclosed fixtures may retain heat. Outdoor installations may face moisture and changing temperatures. The driver’s efficiency, power factor, dimming method, and certification should also be reviewed. Manufacturer datasheets provide the most reliable technical evidence. Avoid relying on a single online calculator.
A perfect formula does not guarantee a perfect installation. I have seen neat calculations overlook poor ventilation and connector losses. That weakness deserves attention. These ten tips help designers, electricians, and buyers make safer decisions. They also encourage a final check against actual product specifications and local electrical requirements. When uncertainty remains, consult a qualified electrical professional. A few extra minutes of verification can protect the lighting system, the driver, and the people using the space.
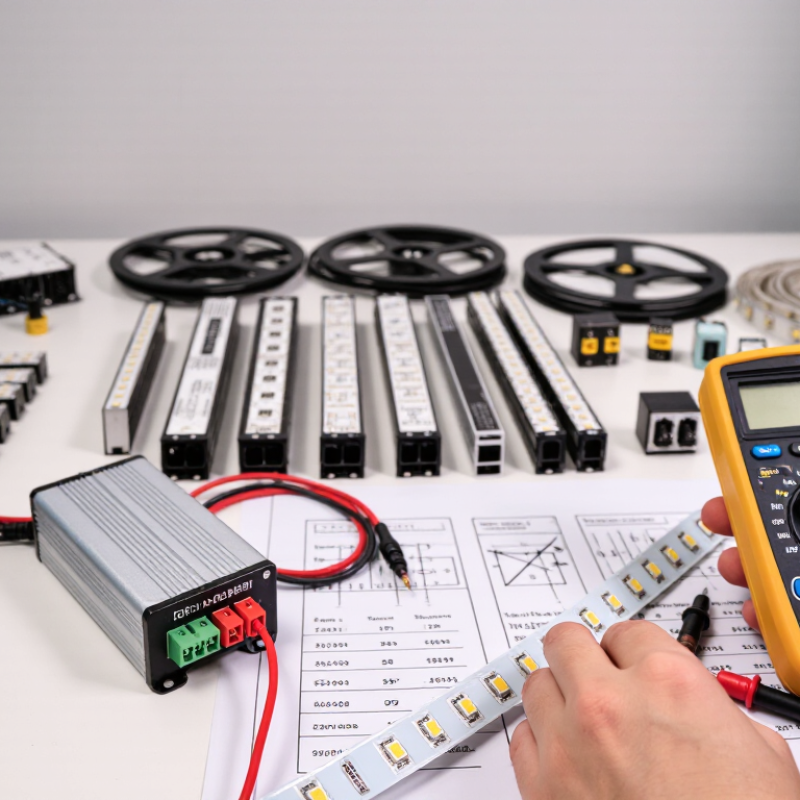
LED driver sizing begins with the real LED load, not the fixture label. Add the wattage of every LED module or strip on the circuit. For example, six 8-watt modules require 48 watts. Check the manufacturer’s measured wattage when available. Rated wattage can differ from actual consumption.
Choose a driver with enough capacity for continuous operation. A practical margin is 20% to 30% above the calculated load. For a 48-watt load, a 60-watt driver may be suitable. Avoid using the full rated output. Heat, voltage variation, and aging can increase electrical stress. Ambient temperature matters too. A driver inside a narrow ceiling cavity may need more capacity than one in open air.
Voltage and current must match the LED system. A constant-voltage LED needs the correct output voltage, while a constant-current LED needs the specified current. Do not substitute one type casually. Check dimming compatibility, startup behavior, and cable length before installation. Long wires can create voltage drop, especially with low-voltage systems. Measure at the LED terminals.
A spreadsheet helps, but it can still mislead. I have seen calculations ignore standby loads and dimming losses. Recheck the numbers under realistic conditions. Then verify the driver’s input wattage, efficiency, and operating temperature from reliable technical documents. The safest calculation is not always the smallest one.
When calculating LED driver wattage, output voltage deserves attention before arithmetic. An LED strip marked 24 V needs a driver that delivers 24 V DC, not merely one with enough watts. Constant-voltage and constant-current systems are not interchangeable. Check the LED label, wiring diagram, and technical sheet. Guessing from appearance is unreliable.
Measure the total load length and power per meter, then multiply them. Add 15–25% headroom for cooler operation and startup variation. For example, 8 meters at 12 W per meter requires 96 W. A practical selection may be around 120 W at the same 24 V output. The voltage must remain compatible. A 150 W driver with the wrong voltage can damage the LEDs. It can also create unstable brightness.
Voltage drop becomes visible on long runs. The far end may look dimmer or slightly warmer. Check cable length, conductor size, and load current before increasing driver voltage. Never boost voltage casually. Use a multimeter to verify output under load, because some drivers read higher when disconnected. Leave room for dimming controls and ventilation. I have seen installations pass a bench test, then flicker inside a sealed ceiling void. That detail is easy to miss. Recheck real operating conditions, not only the label.
| Tip | Calculation Dimension | What to Check | Calculation or Selection Method | Practical Example | Important Requirement |
|---|---|---|---|---|---|
| 1 | Identify the LED load type | Determine whether the LED module requires constant voltage or constant current. | Use a constant-voltage driver for LED products specified in volts, such as 12 V or 24 V. Use a constant-current driver for products specified in milliamperes, such as 350 mA or 700 mA. | A 24 V LED strip normally requires a 24 V constant-voltage driver. | Do not substitute a constant-current driver for a constant-voltage LED strip unless the product documentation specifically permits it. |
| 2 | Confirm the required output voltage | Read the LED load label, technical datasheet, or installation instructions. | For a constant-voltage system, the driver output voltage must match the LED load voltage. Common low-voltage LED systems include 5 V, 12 V, and 24 V. | A load marked “24 V DC” should be paired with a driver providing 24 V DC output. | The output voltage should not be higher than the LED load’s rated voltage unless the system includes a suitable voltage regulator. |
| 3 | Calculate total LED power | Find the power rating per lamp, module, or meter of LED strip. | Total LED Power = Unit Power × Quantity or Length | Five LED modules rated at 8 W each require: 8 W × 5 = 40 W. | Use the actual connected load rather than the maximum rating of an unused output circuit. |
| 4 | Calculate current when wattage is not listed | Use the rated voltage and current of the LED load. | Power (W) = Voltage (V) × Current (A) | A 24 V LED load drawing 2 A requires: 24 V × 2 A = 48 W. | Use amperes in the formula. Convert milliamperes to amperes by dividing by 1,000. |
| 5 | Calculate current for a constant-voltage load | Check the total wattage and the required output voltage. | Required Output Current (A) = Total LED Power (W) ÷ Output Voltage (V) | A 60 W, 12 V LED load requires: 60 W ÷ 12 V = 5 A. | The selected driver must provide at least the calculated output current at the correct voltage. |
| 6 | Add a design margin | Allow capacity for continuous operation, temperature, and normal power variation. | Recommended Driver Wattage = Total LED Power × 1.20 to 1.25 | For a 60 W LED load, a 20% margin gives: 60 W × 1.20 = 72 W. | A driver rated at approximately 72 W or more may be suitable if its voltage and current specifications also match. |
| 7 | Verify the driver’s rated output range | Check the driver label for output voltage, maximum current, and rated wattage. | For a constant-voltage driver, confirm that the stated output voltage equals the LED load voltage and that the maximum output current is sufficient. | For a 24 V, 4 A load, choose a driver rated for 24 V DC and at least 4 A output, subject to the design margin. | Output wattage can be checked with: Output Wattage = Output Voltage × Maximum Output Current. |
| 8 | Account for cable voltage drop | Consider cable length, conductor resistance, load current, and wire size. | Voltage drop increases as cable resistance and current increase. Measure the voltage at the LED load, not only at the driver terminals. | A long 12 V LED-strip installation may show reduced brightness at the far end if the delivered voltage falls below the strip’s operating requirement. | Use shorter runs, larger conductors, parallel power injection, or a suitable distribution layout where necessary. Do not intentionally overvoltage the LEDs to compensate. |
| 9 | Check input power and efficiency | Distinguish the driver’s input power from its DC output power. | Approximate Input Power = Output Power ÷ Efficiency | If the LED output is 75 W and efficiency is 90%, approximate input power is: 75 W ÷ 0.90 = 83.3 W. | Use the driver’s datasheet for actual efficiency, input current, heat dissipation, and circuit protection requirements. |
| 10 | Check compatibility and operating conditions | Review dimming method, minimum load, environmental rating, ambient temperature, and safety requirements. | Confirm that the driver supports the intended dimmer or control signal and that its operating temperature and enclosure rating suit the installation location. | An outdoor installation may require a driver with an appropriate enclosure rating, while a dimmable LED system requires a compatible dimming interface. | Correct wattage alone does not guarantee compatibility. Follow the LED and driver manufacturer’s electrical installation specifications. |
Quick verification: For a constant-voltage LED load, confirm that the driver voltage matches the LED voltage, calculate the total load wattage, add approximately 20% to 25% capacity, and verify the driver’s maximum current, temperature rating, dimming compatibility, and installation requirements.
Calculating LED power starts with the fixture load. For one fixture, multiply voltage by current, or use its rated wattage. A 24-volt fixture drawing 1.5 amps requires 36 watts. Add the driver’s electrical demand, not only the visible light output. The U.S. Department of Energy’s Energy Savings Forecast of Solid-State Lighting Applications reports that LED lighting can use at least 75% less energy than incandescent lighting, but efficiency still varies between fixtures.
For multiple fixtures, add every fixture wattage together. Three 36-watt fixtures create a 108-watt load. If the driver operates at 90% efficiency, divide 108 by 0.90. The result is 120 watts before safety margin. A practical 20% reserve raises the recommended capacity to 144 watts. Keep the calculation clear. It prevents overheating and unwanted shutdowns.
Check the driver’s output voltage and current range. Constant-voltage systems need matching voltage, while constant-current systems need compatible current regulation. The U.S. DOE Solid-State Lighting R&D Plan identifies improved driver efficiency as important for reducing system losses.
I usually recheck cable length, dimming, and startup current. I have missed inrush current before. That small oversight can make a correctly sized driver fail in real installations. Also, do not run a driver continuously at its maximum rating. Conditions change. Allowing headroom is less elegant, but more reliable.
Top 10 Tips on How to Calculate LED Driver Wattage
Adding Safety Headroom for Reliable Driver Performance
Accurate wattage calculation starts with the LED load, not the driver label. Multiply the system voltage by its operating current. For example, a 24-volt strip drawing 3.2 amps requires 76.8 watts. Do not stop there. Add a practical safety margin of 20% to 30% for heat, voltage variation, aging, and startup demand. A 25% allowance raises this example to 96 watts. Leave room.
The chosen driver should provide at least that calculated output while matching the LED voltage and current range. A larger unit is not automatically safer. Excessive oversizing may reduce efficiency, create unstable dimming, or exceed the minimum load requirement. Check the datasheet carefully, especially for enclosed installations. Heat builds quickly inside a shallow cabinet. Ventilation matters. Ambient temperature can reduce the driver’s usable capacity, so derating information deserves attention.
I once treated headroom as a simple percentage and overlooked cable losses. That was incomplete. Long cable runs can lower the LED voltage and increase operating problems. Measure the real load when possible, then inspect connections, wire size, dimming controls, and inrush specifications. For continuous commercial use, confirm the calculation against applicable electrical codes and have a qualified professional review the installation. Reliability often depends on details that look minor during planning.
Calculating LED driver wattage requires more than matching a lamp’s printed wattage. Measure the actual LED load first. A 48-watt load needs at least 48 watts of usable output. Adding 20% headroom gives 57.6 watts, so a 60-watt driver may fit. A neat 20% margin is useful, but it is not a law. Dimming range, startup current, and future load changes can require more capacity.
Driver efficiency changes the input demand and operating temperature. At 88% efficiency, a 48-watt output requires about 54.5 watts from the mains. The U.S. Department of Energy’s 2023 Solid-State Lighting R&D report separates laboratory package efficacy from complete luminaire performance. That distinction matters because heat, optics, and drivers reduce real-world results. The IEA’s Energy Efficiency 2024 report also notes that LED products now represent more than half of global lighting sales. More installations make efficiency losses harder to ignore.
Tip: Check output voltage and current, not wattage alone. A constant-current driver must match the LED string’s operating range. Confirm performance at the lowest and highest supply voltage. Review the rated ambient temperature, enclosure airflow, and dimming method. IEC 62384 testing principles reinforce the need to evaluate controlgear under defined operating conditions. I still recheck calculations after installation. Field temperatures often challenge the spreadsheet. Also, avoid running a driver continuously at its maximum rating. A cooler 70-watt driver can be more dependable than a crowded 60-watt unit, even when both appear electrically suitable.
Matching driver wattage, efficiency, and operating conditions
The recommended driver output is calculated with a 20% design margin: LED load × 1.20. Estimated input power assumes 90% driver efficiency: LED load ÷ 0.90. Select a driver whose rated output meets or exceeds the recommended value, and verify voltage, dimming compatibility, ambient temperature, and operating conditions before installation.
Add the wattage of every LED module or strip section. Six 8-watt modules require 48 watts. Use measured wattage when available.
Add about 20% to 30% above the calculated load. A 48-watt load may use a 60-watt driver. Leave room.
Match the driver voltage to the LED system exactly. A 24-volt strip needs 24 volts DC. Wrong voltage can cause damage or unstable brightness.
No. They are different systems. Check the LED label, wiring diagram, and technical sheet before choosing. Do not guess.
Multiply the strip length by its power per meter. Eight meters at 12 watts per meter require 96 watts. A suitable choice may provide about 120 watts at the same voltage.
Cable resistance can create voltage drop along the circuit. The far end may look dimmer or slightly warmer. Check cable length, conductor size, and voltage at the LED terminals.
Yes. Heat reduces usable driver capacity. A driver inside a narrow ceiling cavity needs careful derating. Heat builds quickly. Provide ventilation where possible.
No. Excessive oversizing may reduce efficiency or cause unstable dimming. Some drivers also require a minimum load. Bigger is not automatically better.
Check input wattage, efficiency, operating temperature, dimming compatibility, and startup behavior. Measure output under load, not only while disconnected. I would recheck the calculation. A spreadsheet can miss cable losses or dimming demand.
Calculating LED driver wattage begins with understanding the total electrical load of the LED system. First, identify each fixture’s power rating and add the wattage together, whether you are powering a single light or multiple fixtures. Next, confirm that the driver’s output voltage matches the LED load requirements, since voltage compatibility is essential for safe and stable operation. When determining how to calculate led driver wattage requirements, consider the actual operating conditions rather than relying only on the fixture’s advertised rating.
After calculating the total LED power, add a suitable safety margin to prevent the driver from operating continuously at its maximum capacity. This extra headroom can improve reliability, accommodate minor power fluctuations, and support future expansion. Finally, compare the driver’s rated wattage with its efficiency, ambient temperature, ventilation, and installation environment. A properly selected driver should provide enough usable power under real operating conditions while maintaining efficient, dependable performance over time.
