Choosing outdoor brightness is not a guessing game, although many product pages make it seem that way. The real question is how to choose the right lumens for outdoor lighting without creating glare, dark corners, or wasted energy. Lumens measure total visible light, not beam reach or visual comfort. A 1,000-lumen floodlight may feel harsh near a patio but weak across a long driveway. Mounting height, beam angle, surface color, weather, and surrounding darkness all change the result.
The U.S. Department of Energy’s solid-state lighting reports show that LED efficacy has improved dramatically, often exceeding 100 lumens per watt in practical outdoor products. That efficiency is useful, but higher output is not automatically better. The Illuminating Engineering Society recommends evaluating illuminance, uniformity, glare, and application needs rather than relying on lumens alone. Think in scenes: soft 100–300 lumens for steps, approximately 300–700 lumens for paths, and stronger outputs for security areas. These ranges are guides, not laws. Reflective walls can make a modest fixture appear surprisingly bright.
Lighting researcher Mariana Figueiro has stated, “Light is the most powerful synchronizer of the human circadian system.” Her observation reminds us that outdoor lighting affects more than visibility. Excessive blue-rich light and poorly shielded fixtures can disturb people and wildlife. DarkSky guidance also encourages controlled, targeted, and warmer outdoor illumination. I still find lumen charts imperfect, because real yards rarely match laboratory conditions. The best choice combines measured performance, careful aiming, dimming, and a short evening test. Start lower. Observe shadows. Adjust slowly.
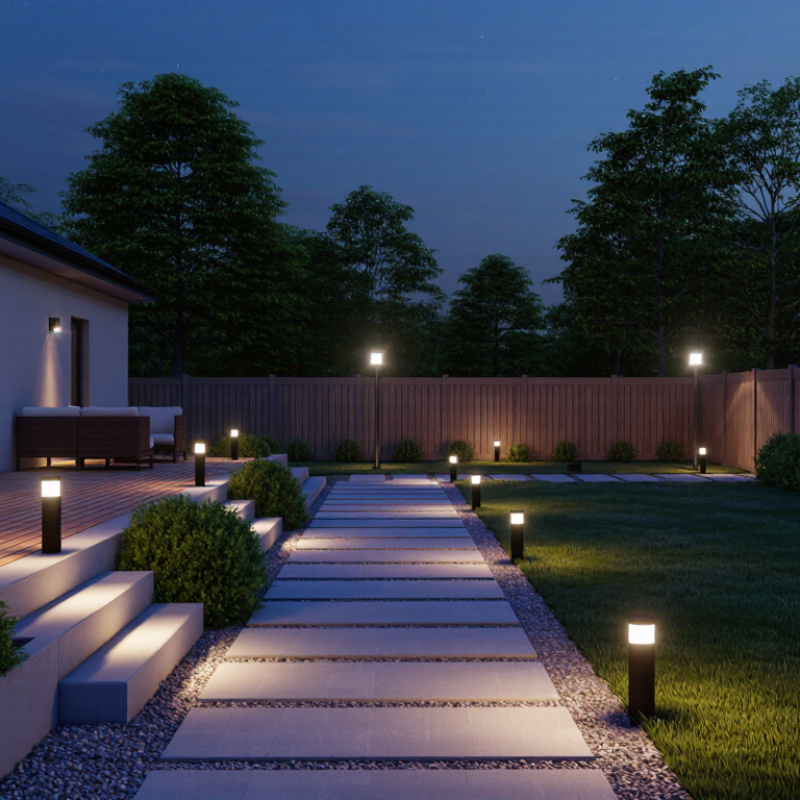
Understanding Lumens and Their Role in Outdoor Lighting
Lumens measure the total amount of visible light produced by an outdoor fixture. They do not measure electricity use; watts measure power consumption instead. This difference matters when comparing lighting options. A 1,000-lumen fixture may appear dim if its beam spreads widely. The same output can look harsh when focused on a small wall. Lumens describe quantity, not comfort or quality.
For a short garden path, 100 to 300 lumens per fixture often provides gentle guidance. Driveways and entrances may need 700 to 1,500 lumens, depending on width, surface color, and surrounding darkness. A pale wall reflects light efficiently, while dark brick absorbs more of it. I once used identical fixtures along a narrow walkway, but the brighter units created glare near eye level. Lower output would have worked better.
Mounting height changes the result, too. A higher fixture spreads light over a larger area, reducing intensity at one point. Check the fixture’s tested lumen output, beam angle, and expected lumen depreciation. Dust, weather, and aging can reduce visible brightness over time. Warm light often feels calmer outdoors, while cooler light can reveal surface details more clearly. Do not judge brightness from lumens alone. Stand where people will walk, look toward the fixture, and notice shadows on steps, plants, and doors. My first plan focused on maximum brightness. It looked secure, but not welcoming.
Assessing the Purpose and Area of Your Outdoor Space
Choosing outdoor lumens starts with purpose, not fixture size. A narrow walkway needs guidance, while a patio needs comfortable facial visibility. IES guidance emphasizes illuminance, measured in lux or footcandles, because lumens alone do not show how light reaches the ground.
As practical starting points, try 100–200 lumens for path markers, 200–400 lumens for steps, and 400–800 lumens for a small entrance.
These figures are not universal. Dark surfaces, tree cover, and fixture height can change the result.
Measure the area before buying. A 3-by-6-meter patio may need several modest fixtures instead of one harsh lamp. Spacing also matters; overlapping beams reduce dark gaps.
The U.S. Department of Energy reports that modern solid-state lighting can exceed 200 lumens per watt in laboratory conditions, but real installations lose output through optics, dirt, temperature, and aging (DOE, 2023 Solid-State Lighting R&D Opportunities). More lumens can still mean worse visibility.
Consider glare and neighboring windows. CIE 150:2017 recommends controlling obtrusive light, including spill and excessive brightness. Shielded fixtures usually preserve comfort better than exposed sources.
In my field experience, people often over-light entrances after seeing one dim corner. That reaction is understandable, but it can create sharp contrast and hidden areas nearby. I sometimes choose fewer lumens, then test the space after dark. Human vision, wall colors, and weather may prove the original calculation wrong.
Matching Lumens to Different Outdoor Lighting Applications
Choosing the right lumens starts with the outdoor task, not the fixture’s advertised brightness. Lumens measure visible light output. They do not show how evenly that light reaches the ground. I have found that a narrow garden path needs less output than a wide driveway. Note the surface color, mounting height, and nearby walls. Pale paving reflects light, while dark stone absorbs it. Shadows can remain even when a fixture looks powerful.
For steps and garden paths, 100 to 300 lumens per fixture often provides comfortable guidance. Even spacing matters more than excessive brightness. A small driveway may need 700 to 1,500 lumens per fixture, depending on beam spread and mounting height. Patio lighting commonly works between 1,000 and 2,000 lumens, especially near cooking areas or outdoor tables. Security lighting should provide broad, consistent coverage. Too much glare can reduce visibility and disturb nearby homes.
Entry doors usually need about 300 to 800 lumens for keyholes, steps, and clear facial visibility. Large walls or trees may look better with several lower-lumen fixtures. Check the beam angle before increasing output. A narrow beam can create harsh bright spots. I once chose 1,500 lumens for a glossy wall, and the reflected light felt uncomfortable. The layout seemed correct on paper. It needed adjustment after installation, especially during rain, when wet surfaces reflected even more light.
How to Choose the Right Lumens for Outdoor Lighting?
Matching lumens to the application helps balance visibility, comfort, and energy use. The ranges below represent typical recommendations per outdoor fixture and may vary with mounting height, beam angle, surface reflectivity, and ambient light.
Guideline: Use lower outputs for decorative or close-range lighting, and higher outputs for wide-area, security, or elevated installations. Avoid excessive brightness near windows, walkways, and neighboring properties.
Adjusting Brightness for Distance, Coverage, and Light Distribution
How to Choose the Right Lumens for Outdoor Lighting?
Lumens measure total light output, but they do not show where the light travels. Distance, coverage, and distribution matter just as much. A 1,000-lumen fixture with a narrow beam can illuminate a distant gate. The same output with a wide beam may brighten a small patio better. For pathways, moderate brightness usually feels safer than intense glare. For larger areas, several lower-output fixtures often create more even coverage than one powerful light. I have found that mounting height changes everything. A light placed three meters high spreads farther, but its ground-level brightness may feel weaker.
Tips: Measure the target area before choosing lumens. Check beam angle and photometric diagrams, not only the lumen number. Narrow beams suit entrances, gates, and long driveways. Wide distributions work better for patios, garden beds, and open walkways. Aim fixtures carefully. Light should reach the ground, not neighboring windows or passing vehicles. Dark surfaces also absorb more light and may require extra output. Keep glare in mind.
A common mistake is choosing the brightest option available. More light does not always mean better visibility. Uneven patches can create harsh contrast, making nearby areas appear darker. I once underestimated a short path because its pale paving reflected more light than expected. This reminded me to test the actual surface, spacing, and viewing angle. If possible, use adjustable fixtures and review the area after sunset. Human comfort matters as much as the calculation.
How to Choose the Right Lumens for Outdoor Lighting? - Adjusting Brightness for Distance, Coverage, and Light Distribution
| Outdoor Area |
Typical Mounting Height |
Coverage Area |
Recommended Beam Distribution |
Recommended Total Lumens |
Approximate Average Illuminance |
Brightness Adjustment Guidance |
| Pathway or Garden Walk |
0.6–1.2 m |
5–15 m² |
Wide, downward-facing distribution |
100–300 lm per fixture |
5–15 lux |
Use lower output for closely spaced fixtures; increase output when fixtures are more than 3 m apart. |
| Outdoor Steps |
0.3–1.0 m |
2–8 m² |
Controlled downward or wall-wash distribution |
100–250 lm per fixture |
10–30 lux |
Prioritize uniformity and glare control rather than maximum lumen output. |
| Front Door or Entry |
1.8–2.5 m |
6–15 m² |
Medium-wide, downward-angled distribution |
500–1,200 lm per fixture |
20–50 lux |
Increase lumens for deep porches, dark surfaces, or mounting heights above 2.5 m. |
| Garage Door or Driveway |
2.0–3.0 m |
20–50 m² |
Medium-wide flood distribution |
1,000–2,500 lm per fixture |
10–30 lux |
Use multiple lower-output fixtures for better uniformity across a wide driveway. |
| Patio or Deck |
1.8–2.5 m |
15–40 m² |
Wide, diffuse, low-glare distribution |
800–2,000 lm total |
10–30 lux |
Choose dimmable fixtures when the space is used for both dining and relaxed evening activities. |
| Small Yard or Garden |
0.6–2.0 m |
30–80 m² |
Layered distribution using spot and wash lighting |
1,000–3,000 lm total |
5–20 lux |
Use narrow beams for trees or features and wider beams for general orientation. |
| Security or Motion-Activated Floodlight |
2.5–4.0 m |
50–150 m² |
Adjustable medium-wide or wide flood distribution |
1,500–4,000 lm per fixture |
10–30 lux |
Aim the beam at the target zone; avoid excessive output that creates glare or bright spots. |
| Long Driveway or Side Passage |
2.0–3.5 m |
40–120 m² |
Long-throw, asymmetric, or shielded distribution |
1,000–2,500 lm per fixture |
10–25 lux |
For distances over 10 m, select a tighter beam or add another fixture instead of simply increasing lumens. |
Selection Notes:
Lumens measure the total light output, while lux measures light received over an area. The illuminance figures above are approximate planning ranges based on open outdoor spaces, typical LED efficiency, and reasonably even distribution. Dark surfaces, trees, walls, weather, mounting height, fixture spacing, and beam angle can change the result. For better comfort and efficiency, use shielding, dimming, multiple fixtures, and warm-to-neutral color temperatures where appropriate.
Balancing Brightness, Energy Use, Safety, and Local Conditions
Choosing outdoor lumens starts with the task, not the fixture’s advertised wattage. A narrow path may need 100 to 300 lumens per light, while a broad driveway often needs more. These ranges are starting points, not rules. A porch entrance benefits from clear facial visibility, not harsh glare. Aim light downward and across the walking surface. Too much brightness can hide shadows and disturb nearby bedrooms. I have found that two modest lights often feel safer than one powerful beam.
Energy use depends on how long the light runs and how efficiently it delivers usable light. A timer, motion sensor, or warmer low-level setting can reduce wasted hours. However, sensors may trigger repeatedly near busy sidewalks or swaying branches. Test them after sunset. Wet climates need sealed outdoor-rated housings, while dusty areas require regular cleaning. Snow, foliage, and pale walls can reflect light farther than expected. Color temperature matters, too; softer light usually feels less intrusive in residential spaces.
Local rules may limit brightness, glare, mounting height, or operating hours. Check municipal guidance before installation, especially near roads, wildlife areas, or shared boundaries. For permanent wiring, use a qualified electrician and follow applicable safety requirements. Even illumination is generally more useful for security than extreme brightness at one point. Begin with a lower lumen level, then adjust after observing the entrance, path, and neighboring windows. I still rethink my choices after rainy nights; reflections can make a carefully planned layout feel unexpectedly bright.
Conclusion
Choosing the right brightness is essential for creating outdoor lighting that is practical, comfortable, and energy-efficient. To understand how to choose the right lumens for outdoor lighting, start by identifying the purpose of the space, such as illuminating pathways, entrances, patios, gardens, driveways, or security areas. Lumens measure the total amount of visible light, so the ideal level depends on the area’s size, function, surface color, and existing ambient light. Smaller decorative areas generally need fewer lumens, while larger or safety-focused spaces require brighter illumination.
Distance and light distribution also affect performance. A fixture placed high above the ground or far from the target may need more lumens, while focused beams can provide stronger light in a specific direction. Avoid excessive brightness, which can cause glare, disturb neighbors, and waste energy. Instead, select efficient lighting, use timers or motion sensors where appropriate, and consider local weather and environmental conditions. A balanced approach will improve visibility, safety, comfort, and long-term energy use.

